

TCCPA Kitchen tested
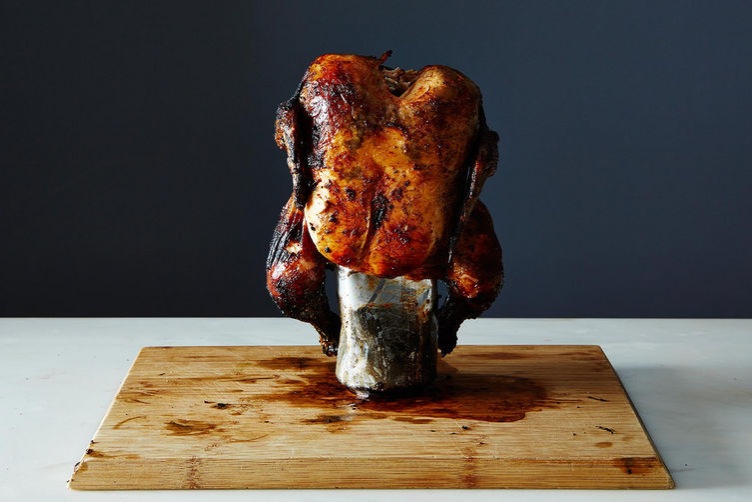
Author Notes: Placing a beer can into the cavity of your dry-rubbed chicken may look silly, but it may be the most flavorful and juiciest chicken you’ve ever made. – Cara Nicoletti
Serves 4
• 6 tablespoons dark brown sugar, packed
• 1 tablespoon smoked paprika
• 1 tablespoon chili powder
• 1 tablespoon red pepper flakes
• 2 teaspoons garlic powder
• 1 teaspoon fennel, ground and toasted
• 2 tablespoons kosher salt
• 1 tablespoon coarse black pepper
• 1/2 tablespoon mustard powder
• 2 tablespoons softened, unsalted butter or olive oil
• One 4-pound chicken, giblets removed
• 4 cloves garlic, peeled and smashed
• One 12-ounce can of beer — drink or pour out half (lager or ales work nicely, but feel free to experiment with other beers you like)
1. To make spice rub simply whisk together all of your dry ingredients in a medium bowl until well combined.
2. Pat the chicken dry with a paper towel and rub it all over with softened butter or olive oil.
3. Sprinkle dry rub all over the chicken in an even layer (you may have a little left over, save it for rubbing on other meats).
4. Drink or spill out half of your beer, drop garlic cloves in can, and place the can inside of the chicken cavity, so that that chicken is sitting on top of it, using its legs as support.
5. Grilling directions: Prepare your grill so that one side is hotter than the other (if you have a charcoal grill, place more coals on one side of the grill than the other. If you have a gas grill, only turn burners on on one side). The internal temperature of the grill should be 300-350F.
6. Place the chicken, perched on its beer can throne, on the cool side of the grill. Close the grill lid and leave the chicken to cook for 1 hour — resist the urge to open the lid and check. Just leave it alone!
7. After an hour, check on the chicken and make sure your coals don’t need refreshing, or that the temperature hasn’t dropped below 300. The chicken will probably need about 30 to 40 more minutes, but insert a meat thermometer into the thickest part of the chicken thigh to check the temperature. Continue cooking for 30 to 40 more minutes, checking every 10 minutes or so, until the temperature reaches 160° F.
8. Removing the chicken from the grill can be tricky — the beer is hot and the chicken is hot — so be careful. Put on some oven mitts and place a cutting board next to the grill. Slide a large metal spatula under the beer can, grab the top of the chicken with a pair of tongs, and carefully transfer it onto the cutting board. Let chicken rest for 10 to 15 minutes before carving and serving.
9. Oven directions: Heat your oven to 350° F. Place your seasoned chicken, balanced on its beer can, in a roasting pan, and place the roasting pan on the lower rack of your oven. Cook until a thermometer reaches 160° F, about 1 1/2 hours.
10. Lift chicken off of beer can using tongs, and transfer to a cutting board. Allow the chicken to rest 10 to 15 minutes before carving.
( BEER CAN CHICKEN from FOOD52.com)